
What I learnt about condensation and ventilation building my DIY garden room last year
I will do a more in-depth article on my garden studio at a later date once it’s completely decorated and I’ve finished the landscaping around it. For now here’s some useful information on vapour control I’ve picked up during the build process.
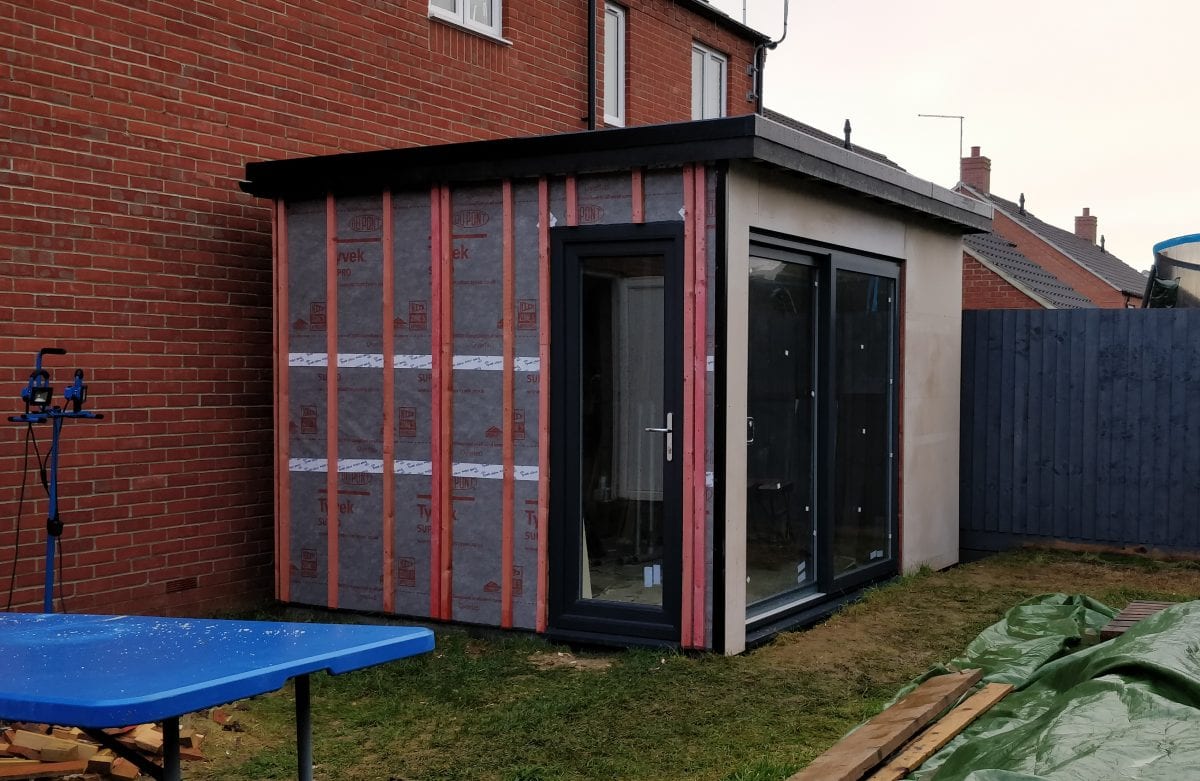
My garden studio construction
For a quick overview, my garden studio is made from 70x47mm C16 treated timber on a 120mm concrete slab. The roof joists and above door openings are 120x47mm C24 treated timber, all sheathed in 12mm marine ply and wrapped with DuPont Tyvek house wrap. It is a cold roof construction covered with EPDM. The external walls are clad with a 12.5mm fire-proof board. Doors are uPVC with toughened, gas filled double glazing.
All framing was done at 400mm centres and I’ve insulated with 70mm PIR foam boards between studs/joists, overlapped with 25mm PIR and another 25mm PIR between the ceiling plasterboard battens (spur of the moment decision). This gives me 120mm of insulation at its thickest in the roof, 95mm in the walls and 25mm at its thinest where studs are covered. All joins are foil taped.
The studio is heated by 5m2 of 200watt electric underfloor heating mat, installed over 12.5mm tile backer insulation boards and finished with tile.
There’s a full post on under-floor heating in garden studios covering exactly what I did, here: https://matteasom.com/garden-studio/2022/under-floor-heating-in-garden-studios/
Letting the building breathe
This is where in my research I’d found the most contradictory information. On the one side it was fairly well accepted that an air-tight, draft-free building would be an efficient building, retaining the most heat. On the other side it was considered essential to allow airflow through the building to avoid condensation and mould. No where really explained how it was possible to achieve both without compromising another.
While I was insulating my studio I began noticing the space feeling damp and musty. I have only doors so lack the usual vents found above uPVC windows, and I had been taping up literally every single gap to seal the building up tight. I’d essentially constructed an air-tight box somewhat overlooking that humans require oxygen to breathe and that there was no way for water vapour to escape.
While the Tyvek wrap allowed the cold side of the building to vent moisture, inside I was trapping everything in – both the heat I wanted to retain but also the air and water vapour within it. I needed a ventilation solution that wouldn’t compromise the insulation.
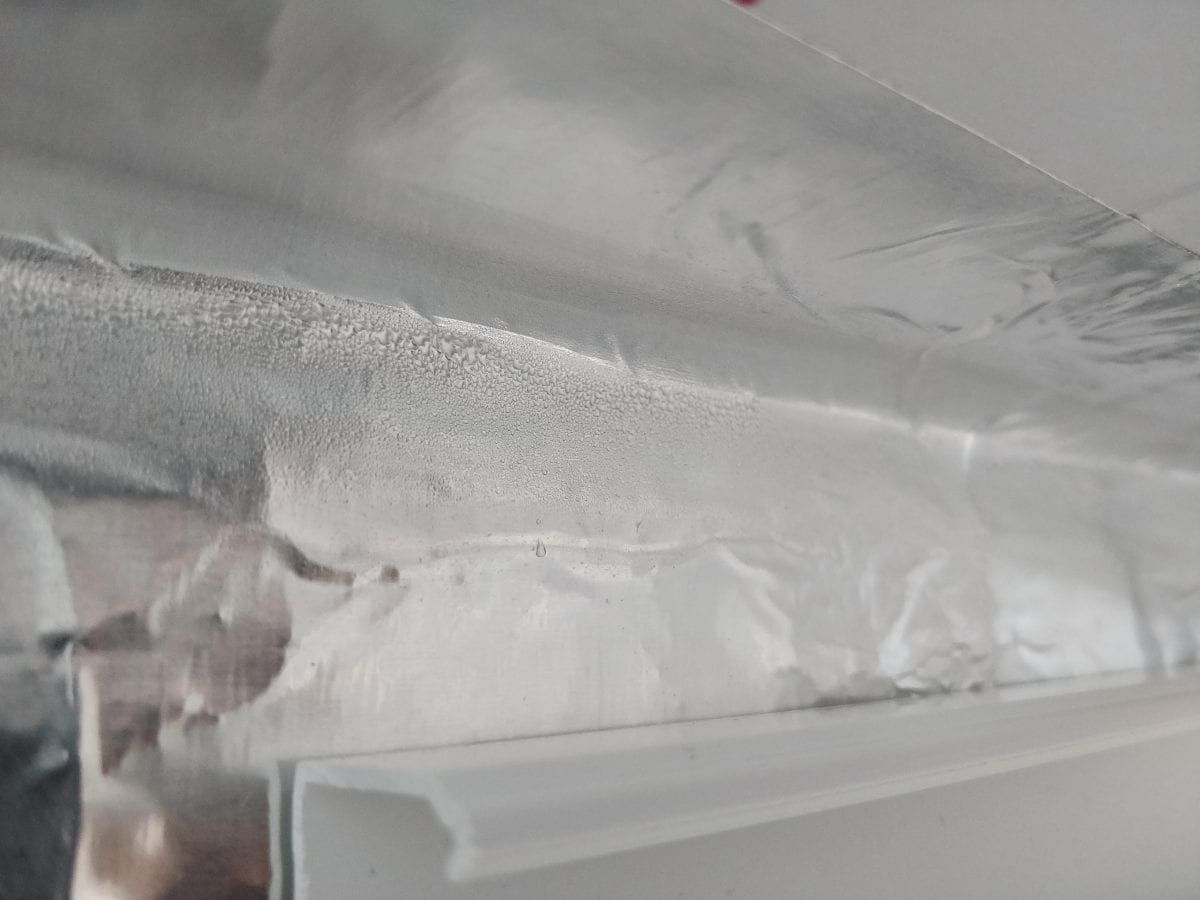
Evidence of Condensation
Condensation will occur when air containing water vapour meets a colder surface. This isn’t necessarily “warm” air it just has to be warmer than the surface for it to condensate on it.
I first noticed evidence of this during the installation of the second layer of 25mm PIR foam. One wall, awaiting its 25mm layer but already foil taped from the 70mm (between stud) insulation had a small amount of condensation on the top-plate which despite the insulated roof was still bridging cold through from outside.
Everywhere that already had this area covered with 25mm PIR showed no sign of condensation at. If you can stop humid air coming into contact with a cold surface by insulating it, you will stop condensation forming there. I was confident my insulation was more than sufficient but I could still “feel” damp in the air.
It’s quite likely that I contributed to this problem by introducing excess water into the room myself. I’d decided to bring some cladding off-cuts that had been rained on inside the studio to dry. They did dry but they released all the water they contained into the sealed room.
With all my walls fully insulated the only surface I was seeing condensation on was my door windows but the air was still musty and damp. I still needed a ventilation solution that wasn’t going to also vent all my heating I’d gone to great length and much expense to retain.
Heat recovery ventilation solutions
For a coupe of years I lived with a mate of mine who had an absolutely amazing “eco-house” designed and built as a case-study by Velux. It had every bit of eco-tech going and was incredibly energy efficient. One of its eco-toys was a mechanical heat exchange ventilation system. This device expelled the internal “damp” air, retaining the heat it contained while bringing in fresh air from outside.
The system consisted of a traditional looking air-con unit that lived outside in addition to the actual heat exchanger that was plumbed into the ventilation throughout the house. That same sort of system wouldn’t be unsuitable for my garden studio but knowing they existed and that technology had probably come on a bit gave me hope something similar and more appropriate was probably now available, and there is!
Single room heat recovery ventilation!
“Single room heat recovery ventilation.” This is exactly what I needed. It seems they were originally developed for bathrooms and public toilets but modern insulation techniques have made them perfect for maintaining good air quality, low humidity and without a huge loss of heat for normal domestic applications too, including garden studios.
I also found that there are “passive” vents that don’t require power. They’re a little smaller and much cheaper but none I found provided the heat recovery that was an absolute “must-have” for me. I felt with these you’d be paying more in the long run in heating bills that a heat recovery solution would have saved.
Most of the devices required only a simple DIY installation (providing you have a BIG hole saw) and contained a “humidistat” that would monitor the humidity (amount of water vapour in the air) and vent only when necessary.
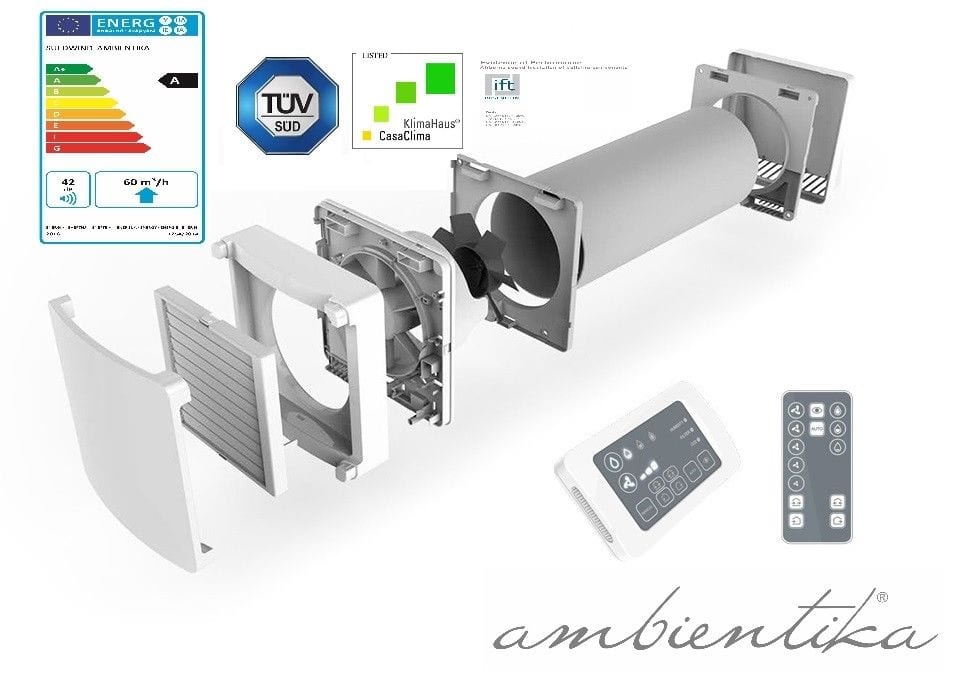
After browsing through the options I eventually settled on a product called the “Suedwind “Ambientika” Solo. Sudewind have variations with wired and wireless remotes but for a garden room the solo version (which works autonomously) would be fine. The Ambientika also had the most low-profile and attractive design so wouldn’t be too imposing in the room.
Suedwind list a minimum wall thickness of 25cm, and my studio walls, even with cladding and plasterboard were still shy of this. They request this for good reason as the ceramic heat exchanger and filters sit within vent tube, they’re not part of the internal unit.
I also wanted to use a “vent silencer” to reduce noise from outside. This little foam device would take up another ~6cm of the tube thickness so I’d need even deeper walls. Fortunately this was barely an issue. I decided to just build a little insulated box onto the rear, external wall of the studio providing me with plenty of girth to accommodate the heat exchanger and silencer. It worked perfectly and isn’t anywhere near as unsightly as I had feared.
Aside from having to build myself this vent box it was a standard installation and it all went without any problems at all. Wiring was easy, you hook it up to a switched, fused spur from a socket and you’re done.
Only time will tell if this has completely solved my garden studio ventilation issues but so far it seems excellent. When it is on it’s very quiet and goes completely unnoticed.
I’ll post an update in a few months time and report how I’ve found it, pros and cons, etc. but “so far, so good!”
The Suedwind Ambientika is available directly from the Suedwind website but I found it selling cheaper on amazon and eBay, links provided below.
Suedwind Ambientika Solo on eBay…
Suedwind Ambientika Solo on Amazon…

IR remote that comes with the Advanced & Wireless models Ambientika + IR remote and the (sold separately wired/wireless control panel with CO2 sensor

Ambientika Advanced on eBay (comes with remote for setting functions manually)
Ambientika Wireless on eBay (remote + can wirelessly connect to additional control panel)
I’m so impressed with this thing that I might even be tempted to upgrade to the Advanced or Wireless model later on. They’re not THAT much more expensive and swapping would be easy. We’ll see.
Hopefully this helps out anyone struggling with condensation issues in their garden studio, insulated summer house, shed, or anyone planning a garden studio build of their own by filling in a gap of information I was unable to find anywhere else online.
Good luck with your project!
// Matt
Hi Matt, interesting post. Did it solve the condensation problem?
Yes, completely. The Ambientika vent has performed perfectly, I couldn’t be more happy with it. The room is solely heated by a 5m2 underfloor heating matt and combined with the Ambientika the room is a lovely temperature and humidity all year ’round. The heat exchanger appears to work very well. I often see that once the heating has been on for a couple of hours in the morning it rarely clicks back on for the rest of the day; very efficient.
Thanks Matt. I’m just at the point of deciding what to do about ventilation in my garden office. I have window vents and my door isn’t the most air tight, so I have more airflow than you, but I still think I’ll go with one of these units and leave the window vents closed.
Hi Matt. I was wondering if you could share the details of the underfloor heating that you used please?
Hi Rachel, sorry for the late reply. I’ve just finished the post detailing my under-floor heating installation. You can find it here: https://matteasom.com/garden-studio/2022/under-floor-heating-in-garden-studios/
Hi Matt, brilliant post, just what I’m looking for! Echoing Rachel’s post, can you share which underfloor heating you used?
Thanks Peter. I’ve just published a post on my electric under-floor heating system and some of the considerations that went into my installation.
You can find the post here: https://matteasom.com/garden-studio/2022/under-floor-heating-in-garden-studios/