
A major concern for me when building my garden studio was how to best optimise the space. I’d decided for numerous reasons I didn’t want the building to take up more than 1/6th of my garden, which resulted in a modest ~3x4m studio.
With a smaller internal space this meant that (perhaps aside from a coffee or side table) every piece of furniture would be placed against a wall. I also had a large sliding patio door. With wall-space being at a premium, I wasn’t prepared to “waste” any on a radiator or heater. This meant looking into underfloor heating; pros, cons and DIY-ability.
I would be specifically looking at the electric under-floor heating kits, commonly used for en-suites and bathrooms.
Considerations for underfloor heating in a garden studio
- Underfloor heating can limit your floor finishing options
- The sub-floor must be considered when selecting your kit
- It’s more difficult to install than an electric wall heater
- It’s slower to heat a room (but we’ll cover why that’s not a big deal)
- No rugs or zero-clearance furniture on top of the heating elements
- Upfront costs vs long-term costs
Electric under-floor heating floor finish considerations
You may need a different type of under-floor heating kit depending on what you intend on your finished floor covering to be.
Laminate and wood flooring, along with carpet and vinyl require a foil mat system. A tiled floor will utilise a mesh mat or loose wire system embedded in a screed.
Think about thermal conductivity too. Tile and stone will conduct heat best. Timber and laminates are less conductive and performance will vary based on wood type, thickness and composition (for the laminates). The better your floor can conduct heat, the more efficient it will be to run.
There are a lot of laminates and carpets not suitable for under-floor heating so if you’re going to go that route be sure to check with the manufacturer.
The thicker your floor covering the more likely you’ll be trapping the heat under it. A thick carpet with a rubber back will essentially just insulate your heating system and you’d barely feel it. It could also cause the heating system to overheat and fail.
The floor covering also affects the maximum temperature you can heat your floor to. Tile and stone can be heated to in excess of 29 degrees, whereas wood and laminate can start deforming if they get too hot.
While laminates and carpets are particularly hit and miss, it’d be good practice to check with the manufacturer whatever flooring type you’re looking to install. Imagine picking out the only floor tile in the shop unsuitable for under-floor heating systems and having them all crack or explode the first time you turn up the thermostat!
Avoid a huge disaster and wasting money and materials, have your flooring manufacturer confirm it’s good for under-floor heating.
Electric under floor heating sub-floor restrictions
A concrete floor utilises a different heating mat system to a timber floor. As suspended timber floors mounted to ground screws are becoming popular for garden rooms, check that you’re ordering the right kit for your sub-floor type.
If you have a concrete floor but really want a carpet or laminate finished surface, you may need to glue and screw down ply boards. In this case you’ve essentially converted your concrete floor to a timber floor and would need to look into timber floor kits.
For concrete floors with a tiled finish, look into “tile backer insulation boards.” These are adhered to your concrete floor with the heating element installed on top. The boards help reflect the heat into the room rather than having it sucked down into your concrete. They’re not magic, they shouldn’t cost a fortune. They’re basically a sheet of fine polystyrene coated in textured cement-like layers. They are “dimensionally stable” meaning they’re far better to tile on than ply, and they’re waterproof too.
It all varies depending on what combination of sub-floor and finishing flooring you want, and there may be compromises to make if you’re dead-set on some thick squishy carpet.
Installing under-floor heating in a garden studio
There’s no getting around it, installing under-floor heating is a lot more faffing about than fixing a heater to a wall. However, I certainly thought was worth it for what I’d gained over a wall heater.
Given my studio base and intended floor finish, it was only really a couple of extra steps in the process of laying the floor, a little consideration for first-fix electrical and the end result is excellent.
If you’re handy and a meticulous DIYer, you should find the whole process a piece of cake. The main mistake I think a DIYer would make is ordering the wrong system for their sub-floor and intended floor covering, which this post aims to help you with. Just bear in mind I’m only sharing my own experience, I’m no expert.
The process will vary a little depending on your sub and finished floor choices but essentially you stick a heating element down to the floor. You connect the heating element to a thermostat powering it from a switched fused spur. You’ll also install a temperature sensor into the floor and run the cable for this up to the thermostat too.
Pull out a multimeter and perform a continuity test to check there are no breaks in the element before installing your finished floor. Test again after the floor is down to make sure you didn’t damage it during the floor fitting.
That’s about all there is to it. Maybe some thermostat calibration (depends on the thermostat) but aside from that, you turn on the heating and your floor starts heating up.
Allow for some expansion under your skirting, particularly for wood and laminate floors. As these heat they will expand and it’s far better they expand under a skirting board that’s hidden, that hitting the wall and bowing your floor up in random places.
Electric under-floor heating time (radiant vs convection)
Mini science lesson: Contrary to their name a, “radiator” is convection heating. Underfloor heating is radiant.
Convection heating (from a radiator) heats the air around it, moving it up as its heated and circulating back down when it cools. Radiant under-floor heating directly heats the floor and objects touching it (including you).
There’s little point in trying to give you figures for this. There are a lot of variables that will affect the heating time of an under-floor system in your studio and how you experience this heat. Everything including ventilation, insulation, size of room, furniture in the room, floor covering, there’s lots that influences it.
With under-floor heating you can worry a little less about heat escaping out of windows or when someone opens a door. While the air temp will increase, the fact you’re heating the floor (and not the air) means that floor stays warm whether someone opens a window or lingers around an open door too long.
It can take some time for your floor to get up to temperature though. From cold, I think I’m waiting around 30 mins to really feel my floor warm under-foot. But when it’s there it’s lovely and the heat really lasts. My tiles do a great job of holding on to that heat long after the room gets up to temp and the system is turned off.
A wall heater is up to temp in 5/10 minutes or so and you can feel it almost immediately, providing you’re near it. I don’t need to explain to you how radiators work, but you can bet if you’re on the opposite side of the room it will take quite a while to heat up all the air and for you to notice it.
I didn’t choose under-floor heating for the speed it gets up to temperature. It solved other issues that I saw as more of a priority but certainly in my case and given my options for where a radiator could be placed, I’d say it’s up to temp at a comparable speed to a convection wall heater and personally I think radiant under-floor heating is a nicer heat (though I appreciate this sounds weird).
Don’t forget price too. It’s an important consideration. An electric under-floor heating kit is pretty much universally more expensive than the electric wall radiator options. Especially when you consider backer-boards, thermostat, you may need a more expensive floor finish to get the look you want that’s safe to use with under-floor heating.
Under-floor heating could very well come out on top in terms of cost-effectiveness over time though. Air is like a toddler and is constantly looking to ways to escape, which isn’t great if you’ve spent money heating it up. When your warm air does escape, your radiator will flick back on to replace it. Whereas, a heated floor can stay warm pretty much all day long after initially heating up in the morning. The heat is very slow to dissipate and doesn’t get sucked out of window vents.
Furniture considerations for electric under-floor heating
No rugs. Sorry.
Furniture really needs to be on legs too, around 100mm legs to be on the safe side. I’ve not found this to be all that difficult to accomodate. You’re basically avoiding things like bean bags or foot stools, maybe some coffee tables; anything that doesn’t provide an air gap between the floor and the furniture piece.
I wanted a floor mat at my entrance door so made sure to avoid putting any heat mat down in this spot. I left a 500mm gap around the whole perimeter of the room to ensure I could put book cases up against walls if I ever needed to.
The air gap is important in order to prevent the heating element from overheating and failing. The floor temp sensor only records the temperature in one location and will turn off the heat if the temperature is getting above 28/29°C. If you were to throw some big bean bags down, with the heating on they could cause the element in those locations to exceed a safe temperature and ruin your whole floor. Expensive.
Furniture with legs = Good.
Zero clearance furniture = Bad.
Bean bags = Always bad.
My garden studio under-floor heating system
So what did I do personally? Well my studio is on built on a concrete base, and I wanted large porcelain tiled finish.
For a first ever concrete slab, mine was pretty good but not perfect so I filled some low-spots with concrete floor filler and ground off any high-spots with a masonry grinding disc on an angle grinder. With everything looking pretty good against a spirit level I re-sealed the slab with concrete sealant/primer.
Having measured my floor, I ordered enough Prowarm “Backer Pro” 12.5mm tile backer insulation boards to cover the area. These had to be glued down with a flexible tile adhesive. I was recommended 6x 20kg packs of Ultra Proflex SP (though I’m sure I ended up with some left to do the tiles too). I installed them like large format tiles with a 10mm notched trowel. I didn’t bother back-buttering them, each sheet was still had full adhesive coverage when pressed into place.
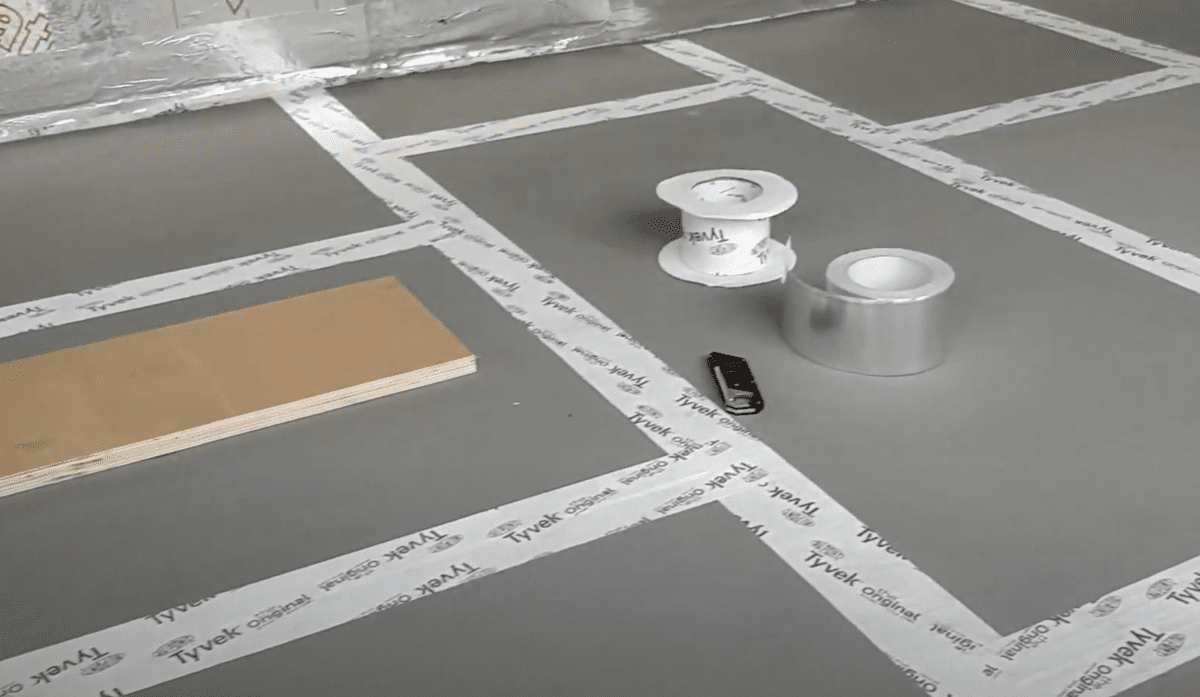
With the backer boards down and adhesive dry, I taped up all the seams with Tyvek tape for a continuous moisture barrier (probably not necessary, but I had some spare). And for good measure used alu foil tape over this in an effort to reflect heat away from the joins and into the room (potentially pointless, but again, I had the tape spare so thought it couldn’t hurt).
Then it was time to lay out my heating mat. This was a 200w ProWarm mat. For a tiled floor this needed to be the mesh mat type. I worked out the floor area, subtracted a perimeter border (to allow for any fixed, zero-clearance furniture) and then subtracted 10% again. If you order too much, you’re in trouble as it can’t be cut down.
I rolled it out to find the mat was quite sticky. This was useful for installation but annoying to figure out where I was going to position it. The powered end has to run to where your thermostat and fused spur are located.
You roll out a length, then when you need to change direction you cut the mesh mat (NOT THE HEATED ELEMENT) bending/flipping over the element to continue in the new direction.
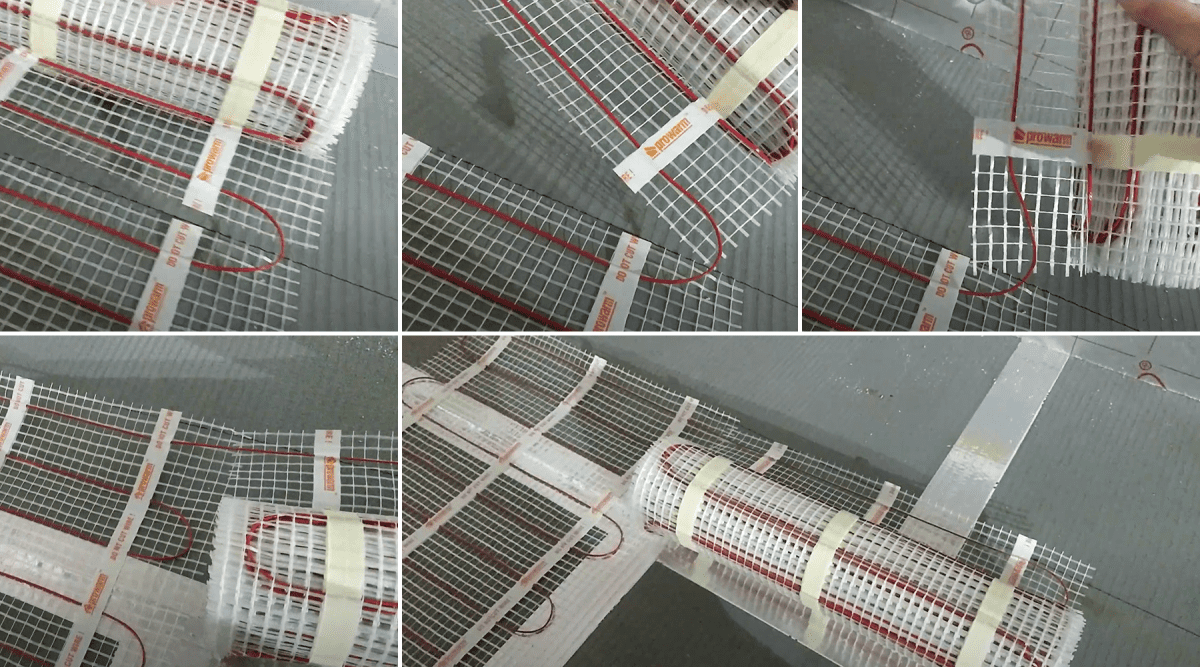
I cut some little channels in the backer board to run the temp sensor and power cable up the wall. The sensor was pushed into a piece of tube and that went into some conduit. The conduit allows me access to the sensor cable without needing to cut out any skirting in future. The tubing means I can remove the sensor from the floor and replace it. No tube and it would be stuck in the screed forever.

The temp sensor and power wires were secured in place with some duct tape. I also used duct-tape to secure the mat down in any places it was lifting. Although the mesh mat is sticky, the adhesive isn’t great especially after repositioning it a couple of times.
With the mat down it was time to screed the floor, fixing it in place forever. The screed should be as thin as possible, but still completely cover all the heating elements. I’d allowed for around 3/4mm coverage. The heating elements and mesh will affect the flow and self-levelling properties of the screed. As the screed runs between and over the elements It will work as a guide to show you how evenly you’re pouring the screed down.
Pouring the screed was pretty easy. Nothing to be scared of but definitely an opportunity to make a big mess if you’re not careful. My screed was two-part; each bag came with a matching liquid to mix it so there was zero chance of getting the ratio wrong like you could with “just add water” products. I mixed in a silicone bucket using just a hand drill and mixing paddle attachment, then poured it down. There are spiked rollers you can use to help level it but I was very wary of these with the heating elements and chose not to. If the spikes are soft, maybe it would have been fine but I didn’t know and I didn’t want to buy a tool just to use it one time.
One other down-side of not using a spiked roller was I ended up with more surface air bubbles. These would have usually been popped by a roller helping to create that smooth, perfect finish. Still perfectly within tolerance for tiling though…
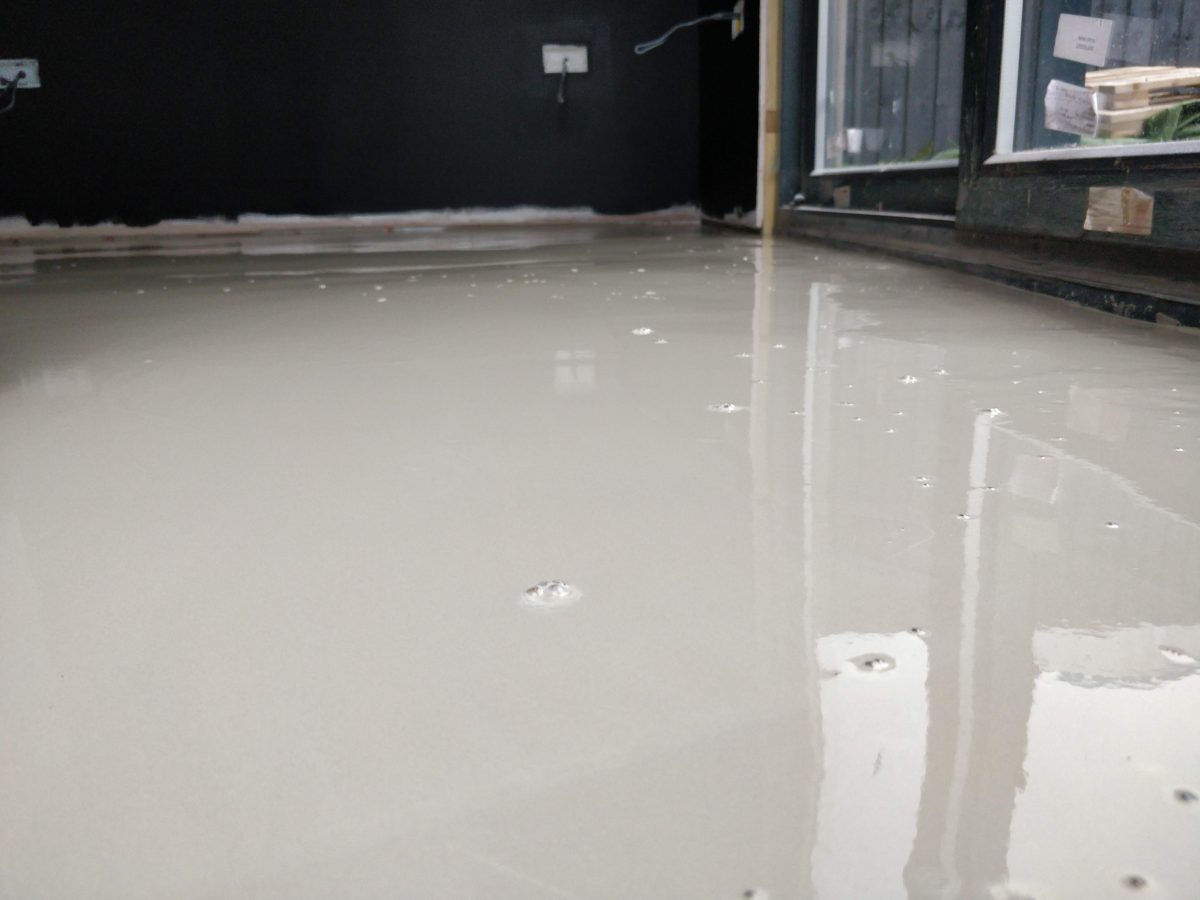
After the screed was dry, the vast majority of the bubbles had popped and pretty much levelled out. I think not using a spiked roller was the right choice. It was kind of weird to think that my whole heating system has now hidden under the floor.
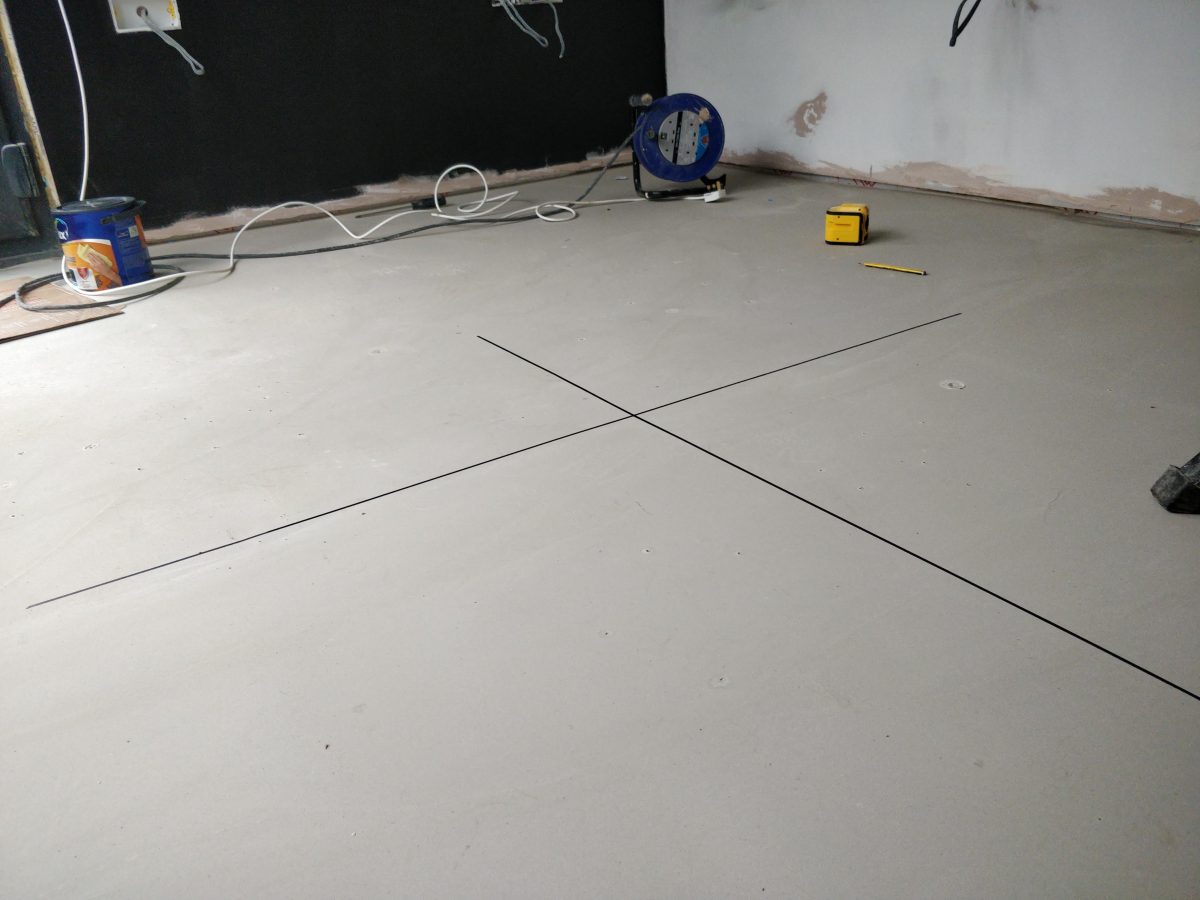
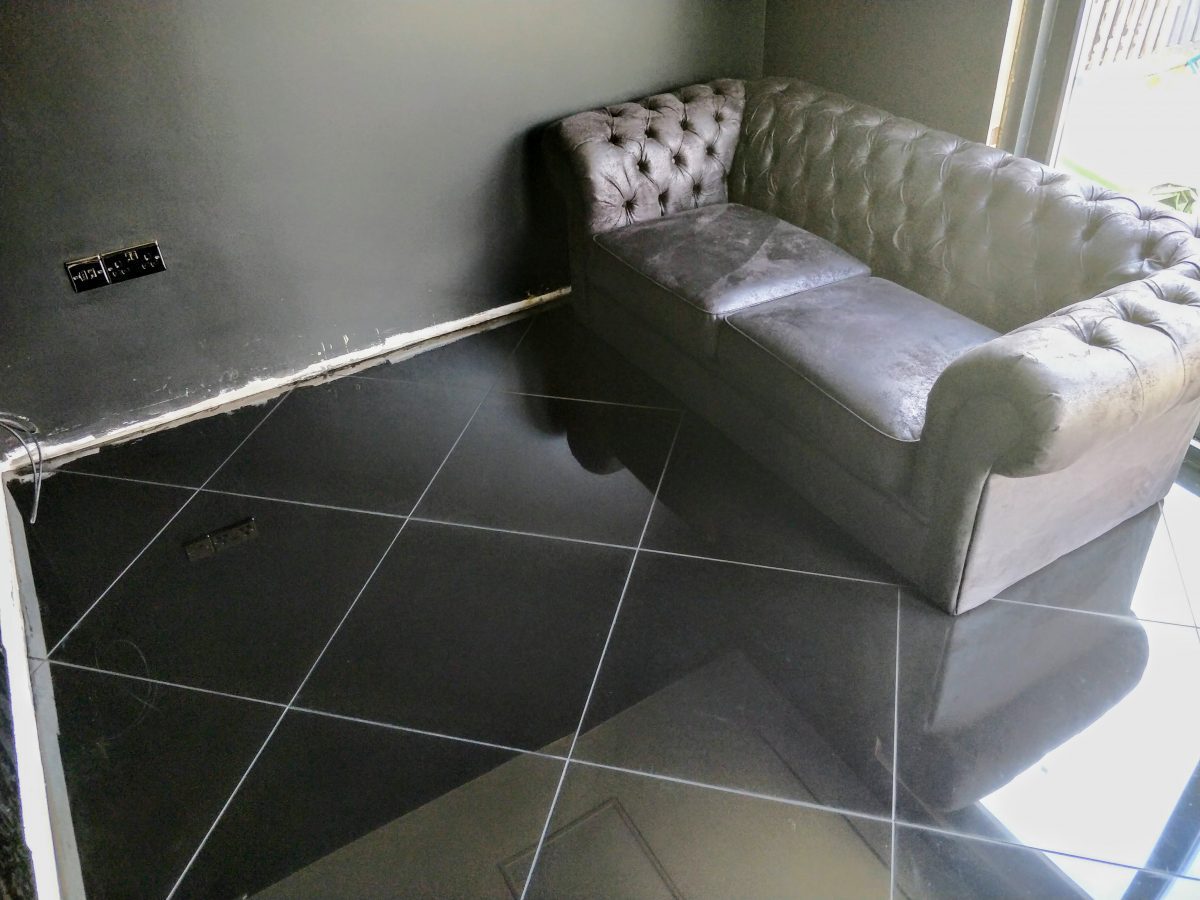
Next was tiles. I’ll spare you the details of the tiling for another post, we’re here for under-floor heating. It was stressful but it turned out great. I went for a 600mm high-gloss, black porcelain tile and black grout, laid in a diamond pattern (for increased installation stress).
When it came to wiring it in, this wasn’t much different from a basic lighting circuit, with the thermostat in place of a switch.
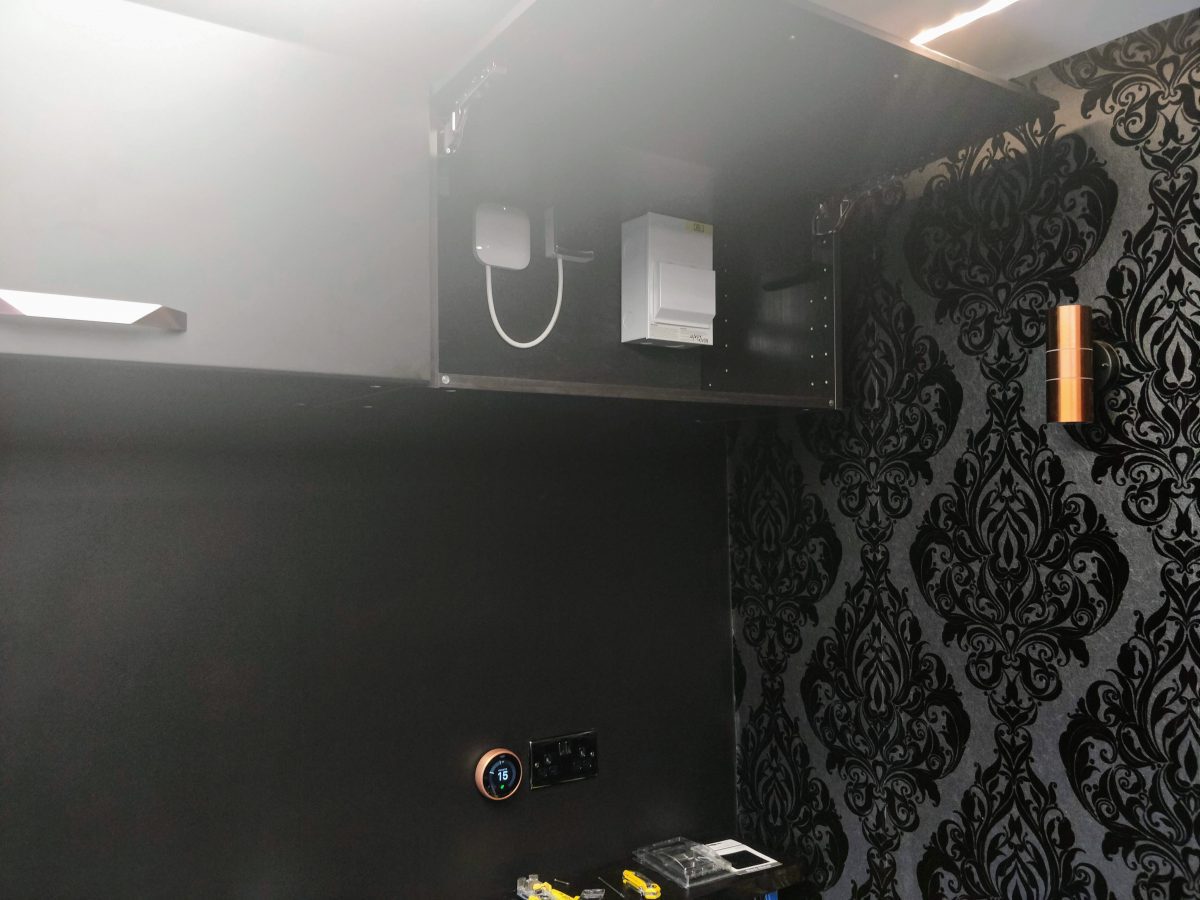
I can’t show you any of the ProWarm thermostat wiring, or talk you through the process because I never used it. I actually didn’t use an under-floor heating thermostat at all. My floor temperature sensor isn’t even connected up.
Here’s where I don’t recommend you copy me. I’ve already said numerous times underfloor heating systems (specifically the thermostats) measure the floor temperature and not the air temperature but ever the rule breaker, I wanted a smart, wifi thermostat. I specifically wanted something that was going to connect seamlessly to the Google Home “ecosystem.” The smart under-floor heating thermostat options at the time were abysmal; insanely expensive coupled with poor connectivity and/or features. I decided I’d investigate the possibility of using a Nest thermostat, like I already had in my house. *audible gasps*
After weighing up some pros and cons, I arrived at the conclusion that it was quite unlikely anything catastrophic would occur from ignoring the various manufacturer guidelines. If it ended up being useless or performed poorly I’d just swap the Nest thermostat for the proper ProWarm one (a 2 minute job).
So here’s a section about what you probably shouldn’t attempt, but is what I did anyway…
Nest Thermostat with Electric Under-floor Heating System
Electric under-floor heating kits don’t work with current Nest smart thermostats. Or at least they’re not intended to. Nest measures air temperature and an underfloor heating thermostats measure the floor temperature, but I wasn’t going to let a little detail like that stop me. Nest is also only able to switch upto 3 amps. I went to a great deal of effort finding a work around to get Nest to switch a potentially much higher amp circuit, only for my electrician to tell me that my heating mat wouldn’t exceed what Nest can switch anyway.
As a rough guide, take the total m² (area) of the heating mat and multiply it by the power rating of the mat. The resulting figure provides you with the heating output in watts. For the amps (loading), divide the heating output figure by the volts.
For example, 10m² of heating mat, multiplied by 200w = 2000(watts). Divide by 235(volts) = 8.5 amps. A Nest thermostat isn’t rated high enough to switch this on and off.
If you have a large heating mat that would exceed 3 amps, you need to use a solid state relay. The circuit will look something like this…
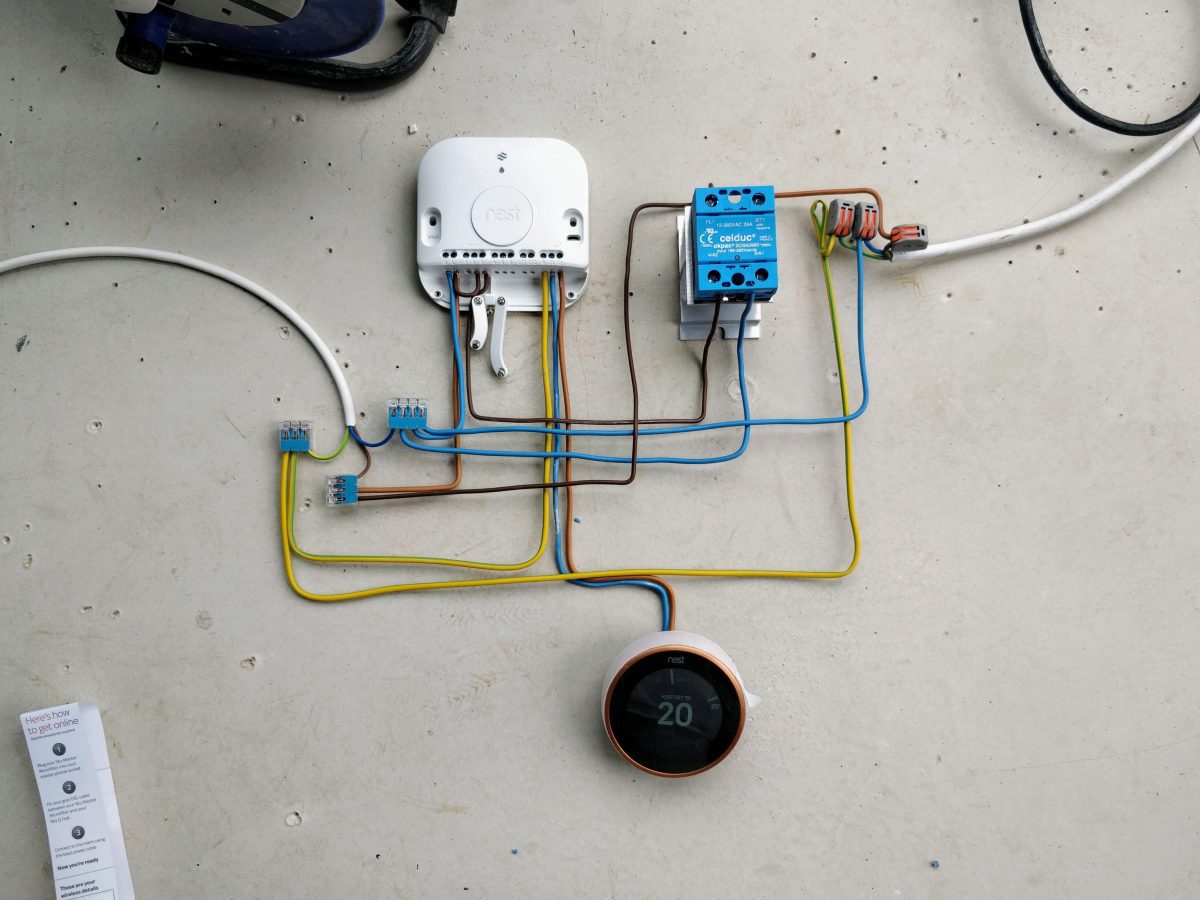
Essentially what you’re looking at is some 240v flex on the left providing the power supply (in reality this would be the 2.5mm twin and earth cable from your switched fused spur). Then you have the Nest Heatlink device, the Nest thermostat itself, a solid state relay (mounted to a heat sink) and on the right some more flex feeding the heat mat (in this bench test the flex only powered a lamp).
When the thermostat reads below the set temperature it sends a request for heat to the Heatlink. The Heatlink would typically then power on your boiler, but we’re having it power on the under-floor heating.
Instead of the Heatlink directly powering on the heat mat (which may draw way more amps than the Heatlink is designed to handle), it turns on the relay and the relay turns on the heat mat instead. This particular relay is rated upto 25 amps.
My intention was to install the relay inside a junction box, which my electrician confirmed would have worked perfectly (and was reasonably impressed with my handy-work) until he did some basic maths and realised the relay was pointless for my application. My heat mat was too small, even at 200w to overload the Nest Heatlink. Fortunately my electrician is incredibly patient and accommodating, qualities which coincidently do not come cheap. Worth it though.
For context, I wired the entire studio myself. My electrician came over after first fix to check my work (I did good). I continued with second fix and then he came back to connect to the house supply, install consumer units and test everything. The testing is essential. It also means even though I DIY’d it, I have all the documentation to show it meets building regulations. As well as peace of mind that it’s all safe.
If you have a basic understanding of domestic wiring, the bench test photo should be fairly self-explanatory. If it isn’t, it’s probably best to forget you saw any of this and to call an electrician. If you ask them to install a Nest thermostat on an electric under-floor heating system, be prepared they will likely tell you it’s a dumb idea and even worse, they’ll be correct.
I feel like I gained a lot more than I have lost from using a Nest thermostat instead of an under-floor specific thermostat. I can’t say I regret it in the slightest, it’s really, really cool. Three winters later and it is all still working flawlessly.
In Summary
My sensible, non-rule-breaking installation (excluding the tiles) was:
- ProWarm Insulated Tile Backer Boards 12.5mm
- ProWarm 200w mesh heat mat
- 3-4mm two-part self-level screed
- Ultra Proflex flexible tile adhesive
- ProWarm under-floor heating thermostat (not used)
Totalling around £600.
Electrician costs for the whole studio inc.:
- New consumer unit in garage
- Consumer unit in studio
- Armoured cable from garage CU to studio CU (~25m)
- Testing/fault finding
This totalled around £500. And numerous cups of tea.
Bad boy, rule-breaking installation extras:
- Nest Smart thermostat
An extra (somewhat unnecessary) £180.
Electric under-floor heating seems to me like a great option for garden studios. I cannot fault my installation, it suits my needs perfectly.
I’m by no means an electrician, a floor fitter or a tiler. I’m simply sharing my own experience and documenting my DIY garden studio project. This is entertainment, not education.
Thanks for reading! I really appreciate it.
What heating system are you putting in your garden studio? Why? Let me know in the comments…
// Matt